Perfectly Tender Boiled Shrimp: The Essential Ice Bath Method
Imagine succulent, perfectly cooked shrimp – plump, firm yet tender, and bursting with flavor. Far too often, shrimp dishes are ruined by overcooking, resulting in a rubbery texture that disappoints even the most ardent seafood lovers. But what if we told you there's a simple, foolproof method to achieve consistently tender boiled shrimp every single time? The secret lies not just in the boiling, but in an often-overlooked post-cooking step: the essential ice bath.
This technique, beloved in culinary traditions around the world, particularly in Spain where Authentic Spanish Boiled Shrimp: Ready in Just 5 Minutes are a cherished delicacy, ensures your shrimp are cooked to perfection and remain incredibly tender. It's a quick, easy, and absolutely delicious boiled shrimp recipe that transforms humble ingredients into a show-stopping dish. Get ready to elevate your shrimp game and discover the true potential of this versatile crustacean.
The Culinary Science Behind the Ice Bath: Why It's Non-Negotiable
For many, boiling shrimp seems straightforward: toss them in hot water until they turn pink. However, stopping the cooking process precisely at the right moment is where many go wrong. Shrimp, like most proteins, continue to cook even after being removed from the heat due to residual internal temperatures. This phenomenon, known as "carryover cooking," is the primary culprit behind tough, chewy shrimp.
Enter the ice bath. This crucial step immediately plunges the hot, cooked shrimp into a bath of ice-cold water, effectively shocking them and halting the cooking process dead in its tracks. The rapid temperature drop prevents carryover cooking, locking in that delicate, tender texture. Without an ice bath, your shrimp would continue to cook for several more minutes, inevitably pushing them past their prime.
Beyond texture, the ice bath offers another significant benefit: it makes peeling a breeze. The sudden contraction of the shrimp meat away from the shell upon contact with cold water helps loosen the shell, allowing it to "pop off" effortlessly. This is especially true for shell-on shrimp, which are often preferred for boiling due to the added flavor the shells impart during cooking. So, if you're aiming for that perfectly tender bite and easy peeling, the ice bath isn't just a suggestion – it's an essential part of any great Boiled Shrimp Done Right: Achieving Optimal Flavor & Texture.
Gathering Your Essentials: Ingredients for the Perfect Boiled Shrimp Recipe
One of the beauties of this boiled shrimp recipe is its simplicity. You don't need a pantry full of exotic spices; the focus is on quality ingredients and a precise technique. Here's what you'll need to create your perfectly tender boiled shrimp:
- Shrimp: For the best results, aim for about 2 pounds (1 kilo) of high-quality, raw shrimp. This recipe truly shines with fresh, wild-caught shrimp, whether they are smaller gambas, medium-sized camarones (jumbo shrimp in the US), or larger langostinos (prawns). While frozen shrimp can be used, they must be fully defrosted first, and the texture will never quite match that of fresh. The difference between farm-raised and wild-caught shrimp is often noticeable in flavor and texture, with many connoisseurs advocating for the richer taste of wild-caught varieties.
- Water: You'll need a generous amount of water – approximately 4-5 quarts for boiling the shrimp and another 4 quarts specifically for preparing your ice bath. Adequate water ensures the shrimp cook evenly and that the ice bath remains sufficiently cold.
- Salt: This is more than just a seasoning; it's a flavor enhancer that infuses the shrimp. Traditional sea salt or Kosher salt are excellent choices due to their clean flavor profile. You'll need a good amount for both the boiling water and the ice bath, typically around ¼ cup or to taste, ensuring a well-seasoned result.
- Ice: Crucial for the ice bath! You'll need plenty of ice – several trays or a bag – to create a truly ice-cold shock for your cooked shrimp. Don't skimp on the ice; it's the hero of the tender texture.
- Optional Flavor Enhancers: While the traditional Spanish method relies on the pure flavor of shrimp and salt, you can explore additions. A splash of cider vinegar or a few tablespoons of Old Bay Seasoning (as favored in some American boiled shrimp recipes) can introduce a different flavor profile if you're looking to experiment beyond the classic. For serving, a fresh lemon wedge is almost always a welcome accompaniment.
Your Step-by-Step Guide to Tender Boiled Shrimp
Achieving perfectly tender shrimp is a matter of precision and timing. Follow these steps closely for an unbeatable boiled shrimp recipe:
Step 1: Prepare Your Ice Bath – The Foundation of Tenderness
- Pour approximately 4 quarts of cold water into a large bowl.
- Add about ¼ cup of sea salt (or to your preference) to the water.
- Dump in a generous amount of ice – enough to make the water truly frigid. Stir until most of the salt has dissolved. Set this bowl aside; it needs to be ready for immediate use.
Step 2: Boil the Shrimp – Quick and Precise
- In a large pot, bring 4-5 quarts of water to a rolling boil. If you wish to season the boiling water, you can add a tablespoon or two of salt here as well, along with any optional additions like Old Bay or cider vinegar.
- Once the water is at a vigorous boil, add all the raw shrimp at once. Stir gently to ensure they are submerged and cooking evenly.
- Watch the shrimp very closely! This is the most critical part of the cooking process, as shrimp cook incredibly fast. Depending on their size, they will typically be done in 2-3 minutes.
- You'll know they're ready when they turn opaque pink and begin to float to the top of the water. Their tails will also start to curl inwards slightly. Avoid cooking them until they are tightly curled into a "C" shape, as this is a sign of overcooking.
Step 3: Shock the Shrimp – The Ice Bath Magic
- Immediately after they turn pink and float, remove the shrimp from the boiling water using a large slotted spoon or a spider strainer.
- Without delay, transfer the drained hot shrimp directly into the prepared ice bath.
- Stir the shrimp gently in the ice water to ensure even cooling. If you added a large batch of hot shrimp and the water has warmed significantly, don't hesitate to add more ice to maintain its icy temperature.
- Let the shrimp cool completely in the ice bath for about 15 minutes. This ensures the cooking process is fully arrested and the meat achieves its ultimate tender texture.
Step 4: Drain and Serve
- After 15 minutes, drain the shrimp thoroughly in a colander.
- Serve immediately for a warm, tender bite, or cover with a moist paper towel and refrigerate for up to one day for a chilled appetizer.
Tips for Shrimp Boiling Success
- Don't Overcrowd the Pot: Boiling shrimp in batches if you have a very large quantity ensures the water temperature doesn't drop too much, allowing for even cooking.
- Quality Matters: Always opt for the freshest, highest-quality shrimp you can find. This simple boiled shrimp recipe truly lets the natural flavor of the shrimp shine.
- Seasoning Variations: While a simple salt seasoning is classic, feel free to experiment with spices like Old Bay, garlic powder, or a touch of cayenne pepper in the boiling water for different flavor profiles.
- Storage: Cooked shrimp can be stored in an airtight container in the refrigerator for 1-2 days.
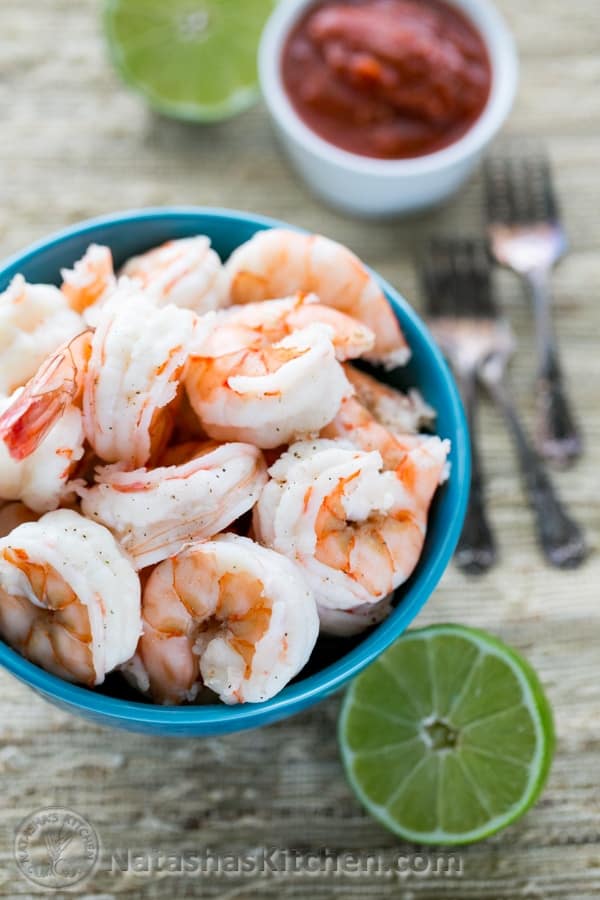
- Serving Ideas: Boiled shrimp are fantastic on their own with a squeeze of fresh lemon juice. They're also superb in shrimp cocktails, salads, tacos, or as a light appetizer. In Spain, they're often served unpeeled, allowing diners to enjoy the ritual of peeling them at the table.
Mastering this simple yet powerful boiled shrimp recipe will transform your approach to cooking seafood. The secret to Boiled Shrimp Done Right: Achieving Optimal Flavor & Texture lies in understanding the critical role of temperature control. With the essential ice bath method, you're not just boiling shrimp; you're crafting a culinary experience that is consistently tender, perfectly seasoned, and utterly delicious. It's a quick, elegant solution that promises to impress every time.
Whether you're preparing a quick weeknight meal or a sophisticated appetizer, this technique guarantees a result that's far superior to any overcooked, rubbery shrimp of the past. Embrace the ice bath, and unlock the true potential of perfectly tender boiled shrimp!
